
CRUD Operations Using jqGrid In ASP.NET MVC
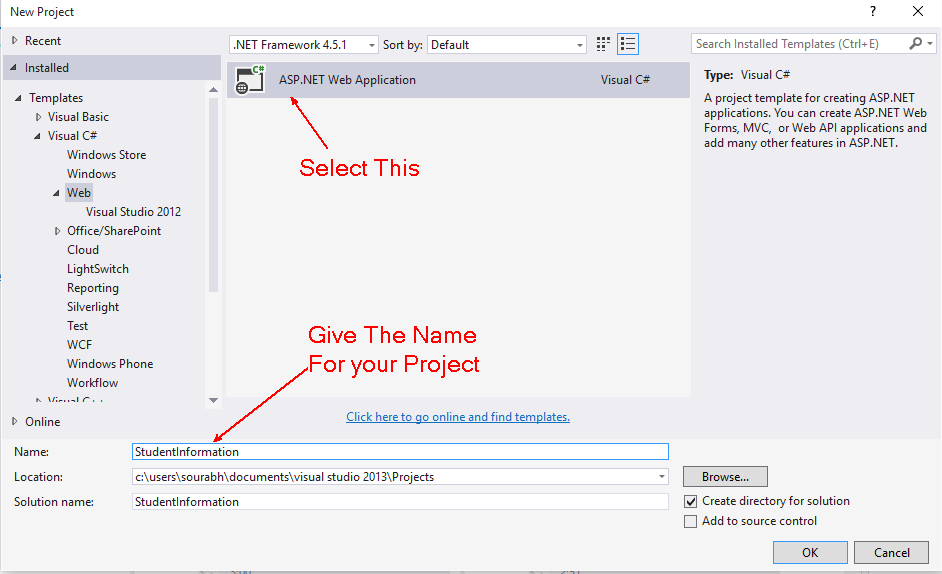
1. Create a new MVC Project and give the name for your project. To create a new MVC
project, Click File > New > Project or press CTRL + SHIFT + N.

2. Select MVC as a project Template with Individual Authentication.


3. Now for creating the table into the database using Code First Approach, I am creating a folder with name "Entities". For creating the folder inside the project right click on the folder and click on Add then click on New Folder.
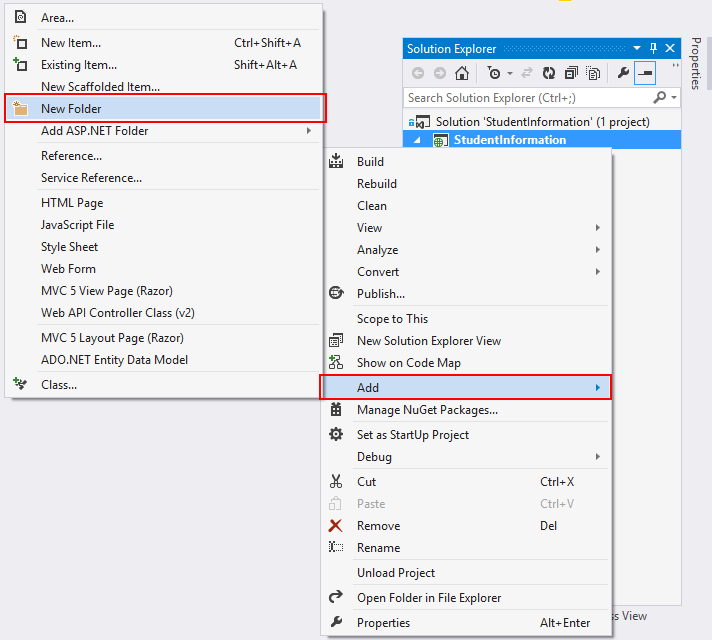

Now give the name for the folder as "Entities".
4. Add a class inside Entities folder with Name "StudentMaster.cs". You can follow the below figure to add class:

Now one dialog box will be open give the name for that class as "StudentMaster.cs".
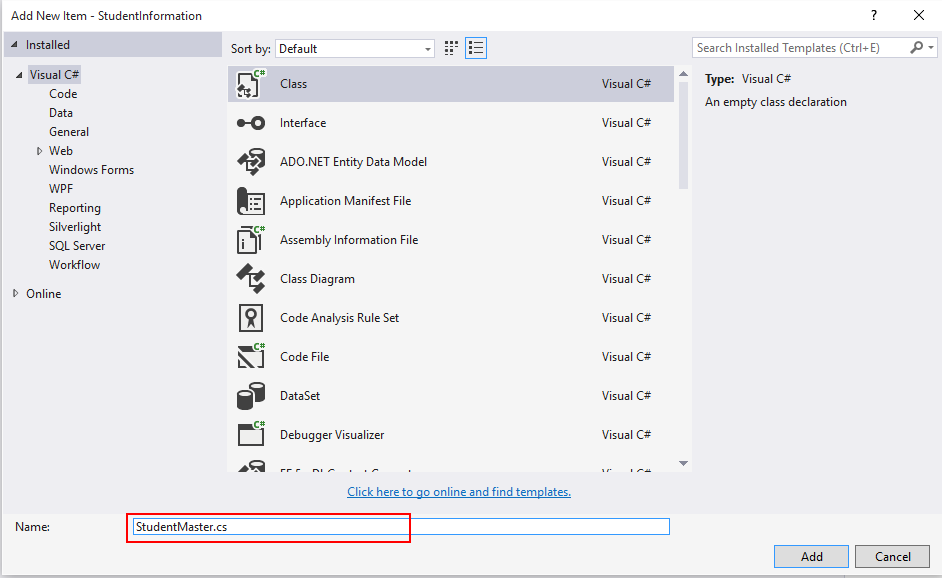

Now one dialog box will be open give the name for that class as "StudentMaster.cs".

5. Now write the following code into "StudentMaster".
- using System;
- using System.Collections.Generic;
- using System.ComponentModel.DataAnnotations;
- using System.Linq;
- using System.Web;
- namespace StudentInformation.Entities
- {
- public class StudentMaster
- {
- [Key]
- public string ID { get; set; }
- [Required]
- public string Name { get; set; }
- [Required]
- public string FatherName { get; set; }
- [Required]
- public string Gender { get; set; }
- [Required]
- public string ClassName { get; set; }
- [Required]
- public DateTime DateOfAdmission { get; set; }
- }
- }
- public DbSet<StudentMaster> Students { get; set; }
- using Microsoft.AspNet.Identity.EntityFramework;
- using StudentInformation.Entities;
- using System.Data.Entity;
- namespace StudentInformation.Models
- {
- // You can add profile data for the user by adding more properties to your ApplicationUser class, please visit http://go.microsoft.com/fwlink/?LinkID=317594 to learn more.
- public class ApplicationUser : IdentityUser
- {
- }
- public class ApplicationDbContext : IdentityDbContext<ApplicationUser>
- {
- public ApplicationDbContext()
- : base("DefaultConnection")
- {
- }
- public DbSet<StudentMaster> Students { get; set; }
- }
- }

8. Now Enable Migrations for the project by using the following code in package manager console:
- PM> Enable-Migrations

10. Open Configuration.cs file and set AutomaticMigrationsEnabled as true.

11. Now build your project once and again open Package Manager Console and write the following code to generate tables and database.
- PM> update-database

13. Now add Controller with name "StudentController". To add controller in your project right click on Controllers folder, Add, then Controller. Here's the figure to add StudentController.
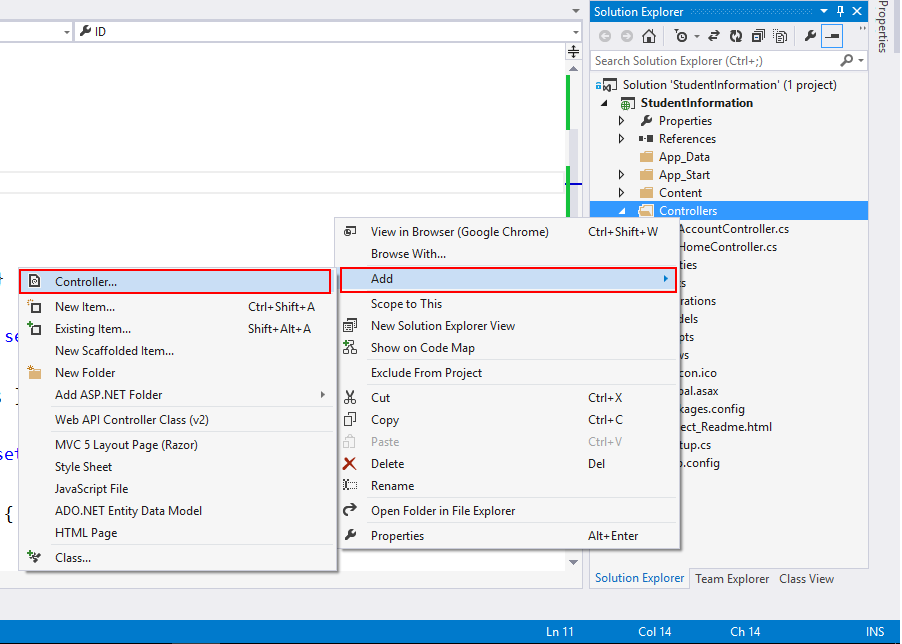

Now add Empty Controller.
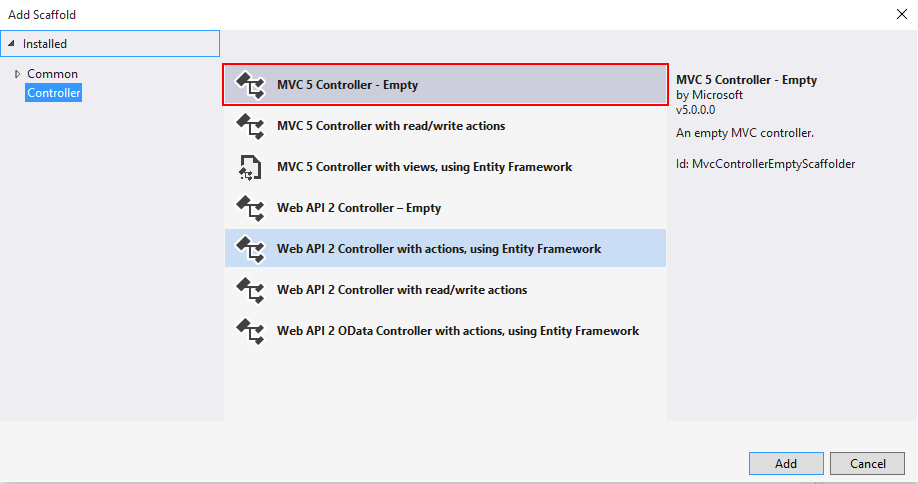
Now give the name for the controller.


Now give the name for the controller.

14. Now Install jqGrid Package from the Nuget Package Manager. To add jqGrid package from the Nuget package Manager,
- Right Click on the References and click on Manage Nuget Packages.
- Now search for jqGrid and install jQuery.jqGrid.

15. Now open StudentController and add View by right clicking Index Action Method.


16. Above operation will generate view, write the following code in that view.
- @{
- ViewBag.Title = "Student Information";
- }
- <h2>Student Information</h2>
- <div>
- <table id="jqGrid"></table>
- <div id="jqControls"></div>
- </div>

Give the name for the file "script".

18. Now open StudentController and write the following code for getting the student information:
- public JsonResult GetStudents(string sidx, string sort, int page, int rows)
- {
- ApplicationDbContext db = new ApplicationDbContext();
- sort = (sort == null) ? "" : sort;
- int pageIndex = Convert.ToInt32(page) - 1;
- int pageSize = rows;
- var StudentList = db.Students.Select(
- t => new
- {
- t.ID,
- t.Name,
- t.FatherName,
- t.Gender,
- t.ClassName,
- t.DateOfAdmission
- });
- int totalRecords = StudentList.Count();
- var totalPages = (int)Math.Ceiling((float)totalRecords / (float)rows);
- if (sort.ToUpper() == "DESC")
- {
- StudentList = StudentList.OrderByDescending(t => t.Name);
- StudentList = StudentList.Skip(pageIndex * pageSize).Take(pageSize);
- }
- else
- {
- StudentList = StudentList.OrderBy(t => t.Name);
- StudentList = StudentList.Skip(pageIndex * pageSize).Take(pageSize);
- }
- var jsonData = new
- {
- total = totalPages,
- page,
- records = totalRecords,
- rows = StudentList
- };
- return Json(jsonData, JsonRequestBehavior.AllowGet);
- }
- $(function () {
- $("#jqGrid").jqGrid({
- url: "/Student/GetStudents",
- datatype: 'json',
- mtype: 'Get',
- colNames: ['ID', 'Student Name', 'Father Name', 'Gender', 'Class', 'Admission Date'],
- colModel: [
- { key: true, hidden: true, name: 'ID', index: 'ID', editable: true },
- { key: false, name: 'Name', index: 'Name', editable: true },
- { key: false, name: 'FatherName', index: 'FatherName', editable: true },
- { key: false, name: 'Gender', index: 'Gender', editable: true, edittype: 'select', editoptions: { value: { 'M': 'Male', 'F': 'Female', 'N': 'None' } } },
- { key: false, name: 'ClassName', index: 'ClassName', editable: true, edittype: 'select', editoptions: { value: { '1': '1st Class', '2': '2nd Class', '3': '3rd Class', '4': '4th Class', '5': '5th Class' } } },
- { key: false, name: 'DateOfAdmission', index: 'DateOfAdmission', editable: true, formatter: 'date', formatoptions: { newformat: 'd/m/Y' } }],
- pager: jQuery('#jqControls'),
- rowNum: 10,
- rowList: [10, 20, 30, 40, 50],
- height: '100%',
- viewrecords: true,
- caption: 'Students Records',
- emptyrecords: 'No Students Records are Available to Display',
- jsonReader: {
- root: "rows",
- page: "page",
- total: "total",
- records: "records",
- repeatitems: false,
- Id: "0"
- },
- autowidth: true,
- multiselect: false
- });
- });
- @{
- ViewBag.Title = "Student Information";
- }
- <h2>Student Information</h2>
- <div>
- <table id="jqGrid"></table>
- <div id="jqControls"></div>
- </div>
- @section scripts{
- <link href="~/Content/themes/base/jquery-ui.css" rel="stylesheet" />
- <link href="~/Content/jquery.jqGrid/ui.jqgrid.css" rel="stylesheet" />
- <script src="~/Scripts/jquery-ui-1.10.4.js"></script>
- <script src="~/Scripts/i18n/grid.locale-en.js"></script>
- <script src="~/Scripts/jquery.jqGrid.min.js"></script>
- <script src="~/Scripts/script.js"></script>
- }
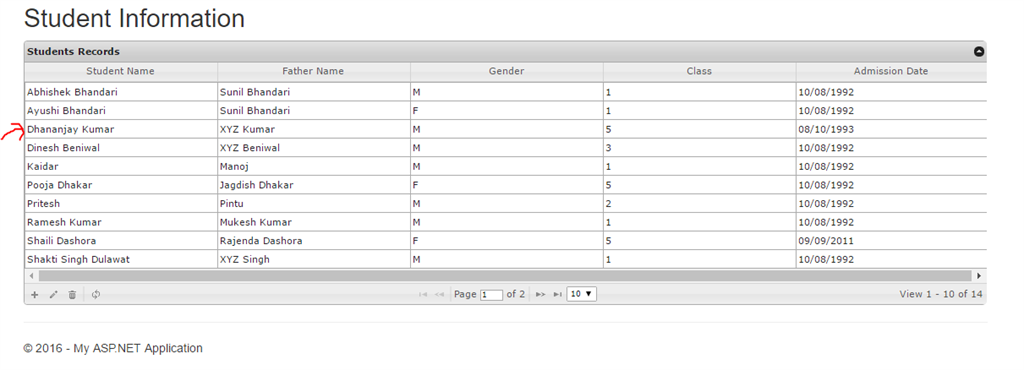
Output:

22. Let's flip to StudentController and write code for create, update and delete.
- For Create
- [HttpPost]
- public string Create([Bind(Exclude = "Id")] StudentMaster Model)
- {
- ApplicationDbContext db = new ApplicationDbContext();
- string msg;
- try
- {
- if (ModelState.IsValid)
- {
- Model.ID = Guid.NewGuid().ToString();
- db.Students.Add(Model);
- db.SaveChanges();
- msg = "Saved Successfully";
- }
- else
- {
- msg = "Validation data not successfully";
- }
- }
- catch (Exception ex)
- {
- msg = "Error occured:" + ex.Message;
- }
- return msg;
- }
- For Update
- public string Edit(StudentMaster Model)
- {
- ApplicationDbContext db = new ApplicationDbContext();
- string msg;
- try
- {
- if (ModelState.IsValid)
- {
- db.Entry(Model).State = EntityState.Modified;
- db.SaveChanges();
- msg = "Saved Successfully";
- }
- else
- {
- msg = "Validation data not successfully";
- }
- }
- catch (Exception ex)
- {
- msg = "Error occured:" + ex.Message;
- }
- return msg;
- }
- For Delete
- public string Delete(string Id)
- {
- ApplicationDbContext db = new ApplicationDbContext();
- StudentMaster student = db.Students.Find(Id);
- db.Students.Remove(student);
- db.SaveChanges();
- return "Deleted successfully";
- }
23. After writing above action methods open script.js file and add functionality for Create, Update, Delete.
script.js File
- $(function () {
- $("#jqGrid").jqGrid({
- url: "/Student/GetStudents",
- datatype: 'json',
- mtype: 'Get',
- colNames: ['ID', 'Student Name', 'Father Name', 'Gender', 'Class', 'Admission Date'],
- colModel: [
- { key: true, hidden: true, name: 'ID', index: 'ID', editable: true },
- { key: false, name: 'Name', index: 'Name', editable: true },
- { key: false, name: 'FatherName', index: 'FatherName', editable: true },
- { key: false, name: 'Gender', index: 'Gender', editable: true, edittype: 'select', editoptions: { value: { 'M': 'Male', 'F': 'Female', 'N': 'None' } } },
- { key: false, name: 'ClassName', index: 'ClassName', editable: true, edittype: 'select', editoptions: { value: { '1': '1st Class', '2': '2nd Class', '3': '3rd Class', '4': '4th Class', '5': '5th Class' } } },
- { key: false, name: 'DateOfAdmission', index: 'DateOfAdmission', editable: true, formatter: 'date', formatoptions: { newformat: 'd/m/Y' } }],
- pager: jQuery('#jqControls'),
- rowNum: 10,
- rowList: [10, 20, 30, 40, 50],
- height: '100%',
- viewrecords: true,
- caption: 'Students Records',
- emptyrecords: 'No Students Records are Available to Display',
- jsonReader: {
- root: "rows",
- page: "page",
- total: "total",
- records: "records",
- repeatitems: false,
- Id: "0"
- },
- autowidth: true,
- multiselect: false
- }).navGrid('#jqControls', { edit: true, add: true, del: true, search: false, refresh: true },
- {
- zIndex: 100,
- url: '/Student/Edit',
- closeOnEscape: true,
- closeAfterEdit: true,
- recreateForm: true,
- afterComplete: function (response) {
- if (response.responseText) {
- alert(response.responseText);
- }
- }
- },
- {
- zIndex: 100,
- url: "/Student/Create",
- closeOnEscape: true,
- closeAfterAdd: true,
- afterComplete: function (response) {
- if (response.responseText) {
- alert(response.responseText);
- }
- }
- },
- {
- zIndex: 100,
- url: "/Student/Delete",
- closeOnEscape: true,
- closeAfterDelete: true,
- recreateForm: true,
- msg: "Are you sure you want to delete Student... ? ",
- afterComplete: function (response) {
- if (response.responseText) {
- alert(response.responseText);
- }
- }
- });
- });
Output

When you click on Create Button


After Adding Students

Editing a Record: For Editing a record you have to select one row and click on Edit Button.


After Updating Record

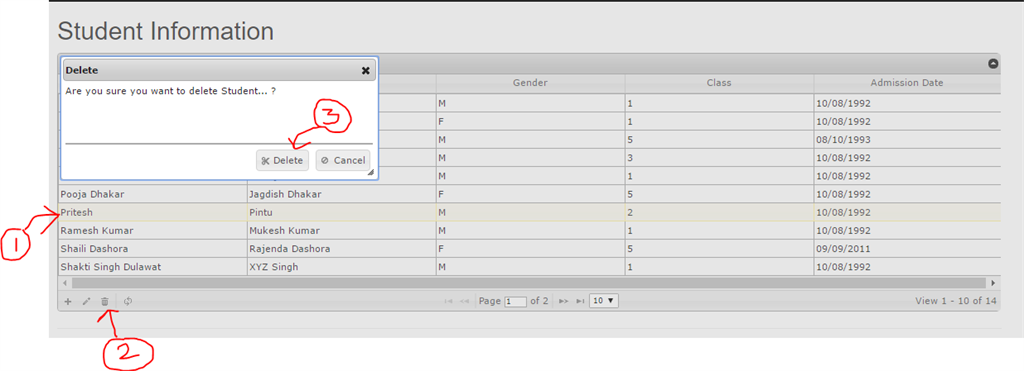
Deleting Record: First of all select a row and press Delete button.

Pagination

When Row List Change

When Collapse Button is pressed

Final Output:

Excellent article and with lots of information. I really learned a lot here. Do share more like this.
ReplyDeleteWeb Designing Training in Chennai
Web Design Classes Online
Web Designing Training in Coimbatore
Great Blog!!! thanks for sharing with us.
ReplyDeletecareer in software testing
software testing career
Excellent Blog, I like your blog and It is very informative. Thank you
ReplyDeleteTableau
Business